Workshops
Workshops are SARC group or classroom STEM activities where members work on electronics, soldering, microcontroller, computer and robotics projects. Each workshop has workshop notes. You can download and use them for free. Please observe all safety warnings and only work under adult supervision. Don't forget to have a lot of fun creating your own circuits and programs!
Workshop list
- Electronics Workshops
- Electronic Components Workshop
- Electronics Prototyping Workshop
- Electronics Construction Workshop
- Electronics Deconstruction Workshop
- Morse Code Workshop
- Soldering Workshops
- Plated Through Hole Soldering Workshop 1 - Practice PCB Kit
- Plated Through Hole Soldering Workshop 2 - Hypnotic Owl Kit
- Plated Through Hole Soldering Workshop 3 - Christmas Tree Kit
- Plated Through Hole Rework Workshop
- Surface Mount Technology Soldering Workshop 1 - Practice PCB Kit
- Surface Mount Technology Soldering Workshop 2 - Touch Dice Kit
- Surface Mount Technology Rework Workshop
- Microelectronics Workshop
- Microcontroller Workshops
- Object-Oriented Programming Workshops
- Computer Workshops
- Robotics Workshops
- Reference Information
Electronics Workshops
The School Amateur Radio Club Network® is pleased to present a series of introductory electronics workshops. These workshops include: Electronics, Electronic Components, Electronics Prototyping and Electronics Deconstruction. In conjunction with these workshops, we also provide a set of Electronics Workshop Lesson Plans. Electronics workshops can be run with a SARC group over lunchtime sessions or as a classroom STEM activity. Learning about electronics is a progressive experience relating everything we do in class to our modern daily lives. We take every opportunity to first explain concepts and then provide practical examples. Along the way we ask lots of questions like:
- Safety first: What are the hazards associated with electronic components and circuits?
- Where does electricity come from? How is it used in a circuit?
- What major achievements depended on electronics? What would life be like without electronics?
- The transistor is the basic building block of all modern electronic circuits. What does it do?
- There are literally millions of transistors in your mobile device. How did they get so small?
- Are you an electronics user or an electronics creator? Can electronics be art too?
- And for the older students: What is the application of electronics to:
- Science?: Units of Voltage, Current, Power, Frequency, Resistance, Capacitance, Inductance are all named after famous scientists.
- Technology?: All modern computers, micro-controllers, communications, manufacturing and entertainment equipment are based on electronic circuits using electronic components.
- Engineering?: Consider Printed Circuit Boards, soldering, assembly, testing and production techniques.
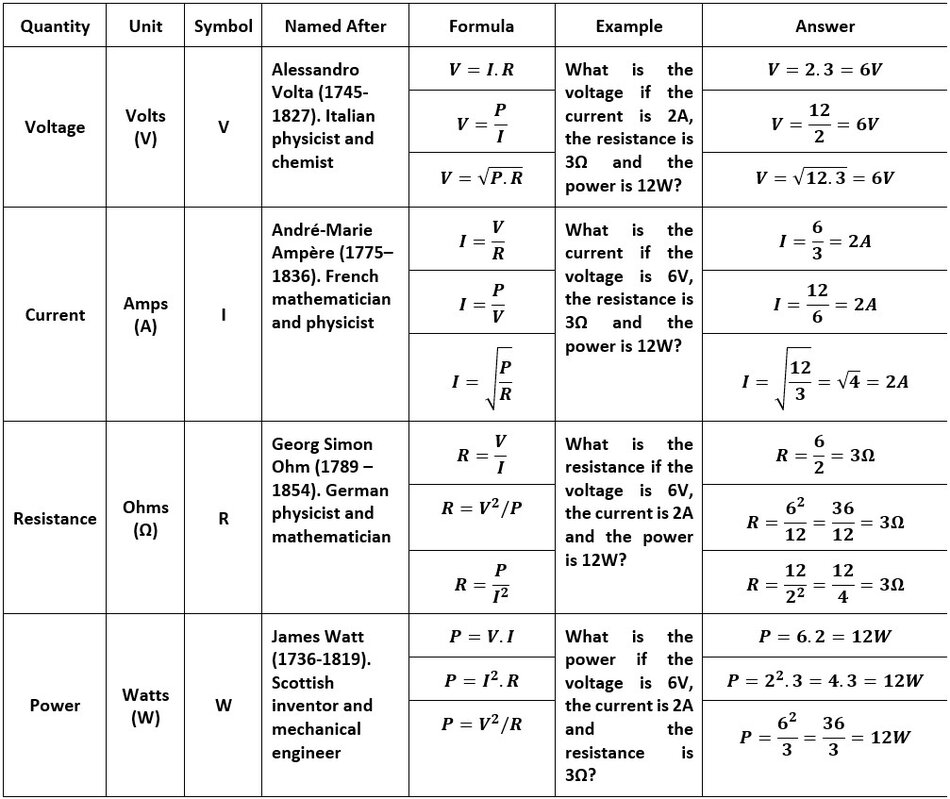
- Mathematics?: Voltage, Current, Resistance and Power are all related by a simple mathematical formulae. See the simple circuit below and the mathematical formulas used to calculate each of these four quantities, knowing only two of the others.

Electronic Components Workshop
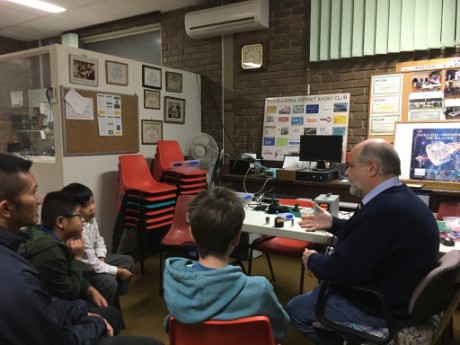
Our electronics components workshops provide a basic introduction to electronics with a description and demonstration of each of the different types of electronic components. Each lesson covers the scientific discovery of electrical quantities and units, the identification and use of technology, engineering design and construction practices and basic mathematical calculations. This series uses relatively-safe, battery-powered, DC circuits only. Safety aspects are emphasised at the start of each lesson.
Lesson 1. Electricity, Conductors and Non-Conductors
Lesson 2. Batteries, Cells, Chemistries, Voltage, Capacity
Lesson 3. Voltage, Current and Resistance: Ohm’s law.
Lesson 4. Power and Energy: Watt’s law and Joule’s Law.
Lesson 5. Semiconductors: Diodes, Light-Emitting Diodes, Solar Cells.
Lesson 6. Transistors
Lesson 7. Capacitors
Lesson 8. Inductors and Transformers
Lesson 9. Electronics Prototyping: Build your own circuits.
Lesson 10. Electronics Construction: Soldering, Build your kits.
Lesson 11. Electronics Deconstruction: Desoldering, See how things work, Repair, Reuse.
In this series students will learn:
- Electrical scientists: Volta, Ampère, Ohm, Watt and Joule
- Electrical quantities and symbols: Voltage, current, resistance, power and energy (V, I, R, P, E)
- Electrical units and symbols: Volt, Amp, Ohm, Watt and Joule (V, A, Ω, W, J)
- Electrical unit multipliers and symbols: Mega, kilo and milli (M, k, m)
- Electrical formulas: Ohm’s law, Watt’s law and Joule’s Law
- Electrical material: Conductors, non-conductors, poor-conductors and insulators
- Electronic components:
- Batteries, polarity, positive, negative, terminals, holders, electrodes, electrolytes, chemistries
- Switches and wires, open-circuit, short-circuit
- Resistors, colour codes
- Diodes, semiconductor junction, anode, cathode, Silicon-, Schottky-, Zener-, Light-Emitting Diode
- Transistors, bipolar junction, NPN and PNP, emitter, base, collector, current gain
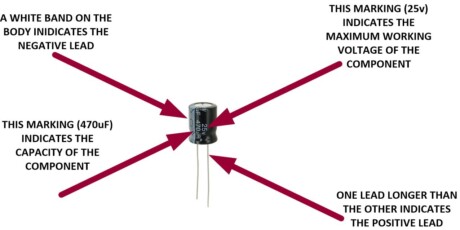
- Capacitors, electric field, electric charge
- Inductors, electromagnetism, electromagnetic induction, magnetic field
- Transformers, primary and secondary windings, polarity, magnetic cores
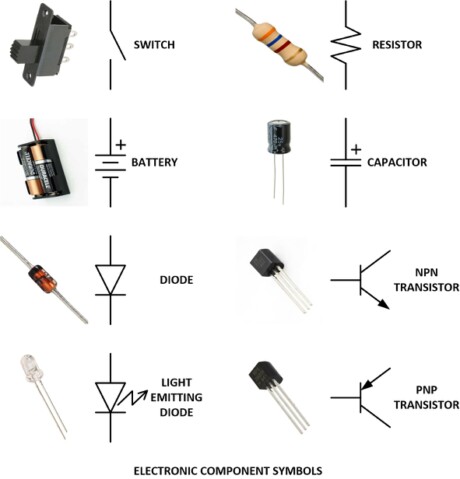
- Electronic component symbols and electronic circuit diagrams
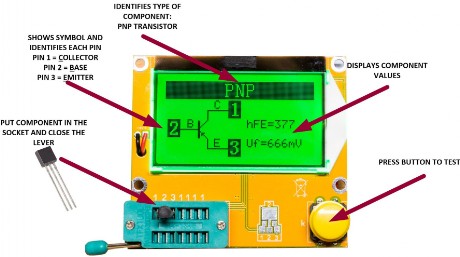
- Electronic instruments: Regulated DC power supply, digital multi-meter, component tester
- Electronics prototyping, kit construction and soldering
- Electronics deconstruction, desoldering, repair and reuse
Each lesson is divided into the following sections:
- Purpose: The aim of the lesson
- Introduction: A statement, which can be read out at the start of the lesson, to introduce the topic
- Safety: Important safety warnings covering risk areas and precautions to be taken
- Key Learning Areas: High level, curriculum-based, topics covered in the lesson
- Learning Outcomes: Details of what the student should learn in the lesson and details of what new skills the student should acquire
- Year Level: The lesson is suitable for the year level shown
- Lesson Time: The approximate time to deliver the lesson
- Resources: Equipment and parts required to complete the lesson
- Teacher Tasks: Actions the teacher should take in delivering the lesson
- Student Tasks: Expectations for the students taking the lesson
- Discussion: Further questions and answers for discussion if time permits
- Evaluation: Approach to assessment

Electronics Prototyping Workshop
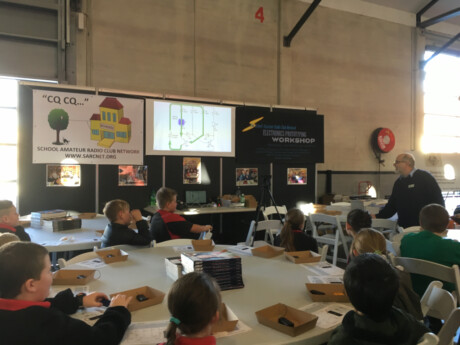
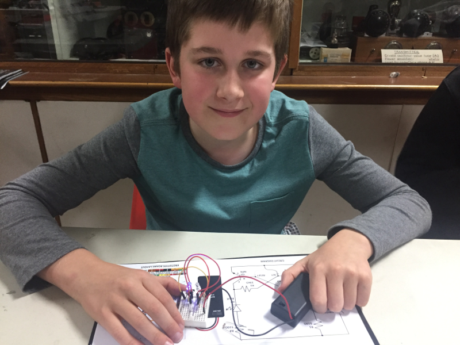
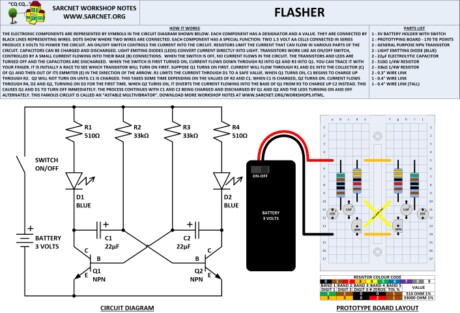
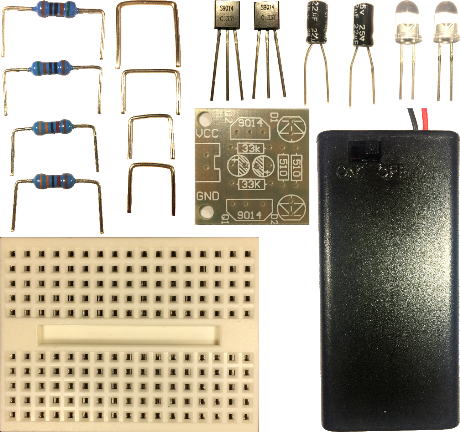
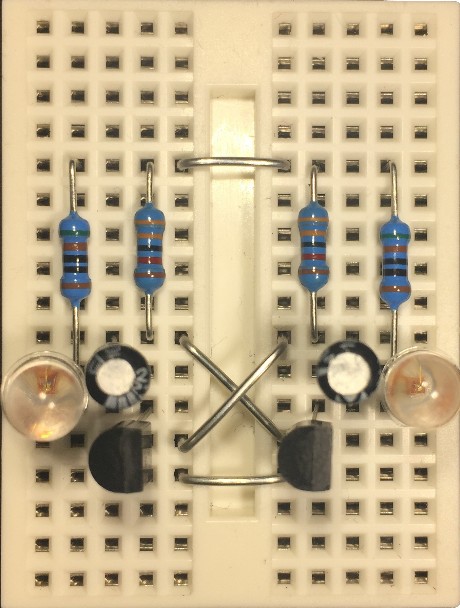
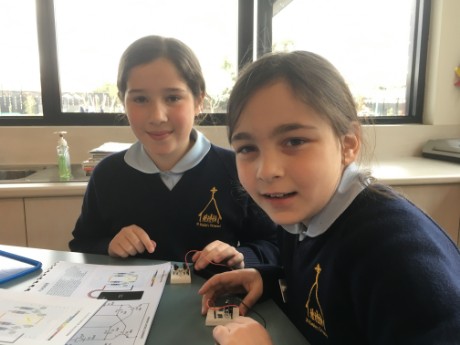
Here students prototype electronic circuits with reusable electronic components and a prototyping board. There is no soldering required! The components are provided, with pre-formed leads, in a kit together with full instructions. Simply insert the components into the prototyping board according to the workshop notes provided.
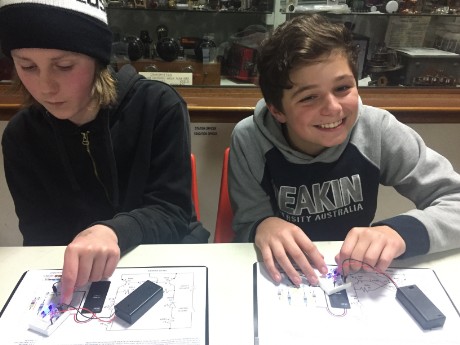
When finished, attach the battery pack to energize your own electronic circuit. We are constantly amazed to see the reaction on the student's faces when their LEDs start to flash. The same components can be reused to build a variety of different circuits.
The prototyping boards and components are often used in other workshops as well. Soon students start to bring along their own component parts containers and tool sets and they proudly show us their own projects which they have completed during the week. See our electronics workshop news story. To participate in this workshop join our Electronics Forum. To purchase electronics prototyping kits, on-line, check out our products page. To get started and learn how to prototype, please download our electronics prototyping workshop presentation.
- Flasher Circuit
- Flip Flop Circuit
- Toggle Circuit
- Tester Circuit
- Super Tester Circuit
- Timer Circuit
Electronics Construction Workshop
While prototype electronic circuits are useful for testing design concepts, circuit connections and operation, they are not suitable for permanent installation. Once the prototype is tested, students move on to constructing a production circuit on a sturdy, Printed Circuit Board (PCB). Skills and techniques learned in this workshop will enable students to construct commercially-available, DIY electronic kits. This workshop teaches students to solder in a proper manner, thereby acquiring a creative, useful and life-long skill.
Students learn to solder in a supervised, safe and controlled environment. The tools and techniques required are described in more detail in our Plated Through Hole (PTH) Soldering Workshops.

Electronics Deconstruction Workshop
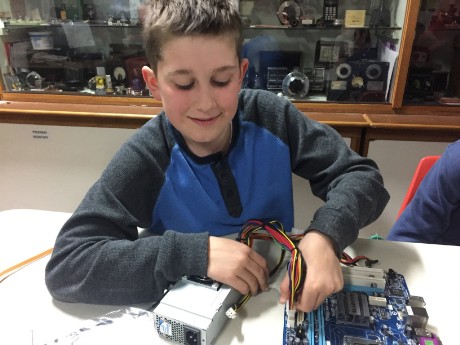
You can learn a lot about something by pulling it apart - How it was made, what is inside it and how it works. It is best to only work on items that don't work or are no longer needed. Although you can't just pull apart anything, you must get adult permission, even if you think you know how to put it back together. Deconstructing a piece of electronics is always tricky. It is easy to break or damage the tiny, sensitive electronic components. You will need to learn how to solder and desolder components. The tools and techniques required are described in more detail in our Plated Through Hole (PTH) Rework Workshop and SMT Rework Workshop.
Some things are too dangerous or difficult to disassemble. So here is a list of what you can pull apart and what you should not pull apart:
Do deconstruct:
- Small electronics items
- Desktop or Laptop Computers, Printers, Mice, Keyboards, Scanners, Disk Drives
- Electronic Games and Consoles
- Radios, HiFi or WiFi devices
Don't deconstruct:
- Large, heavy, greasy, dusty or rusty items
- Items with sharp edges, sharp blades or glass
- Kitchen or household appliances with motors
- Heaters or lamps
- TVs or Monitors
- Mobile devices - Since they require specialised tools and techniques
If you want to pull something apart, please follow these directions:
- Always get the owner's permission (and your parent's) to dissassemble (and most likely destroy) any electronic device - even if it is your own.
- You will need tools and adult supervision to learn how to use them safely. Even a screwdriver can be a hazard if used incorrectly.
- You should have some sealable containers to store the parts you collect.
- ALWAYS keep small parts away from small children.
- NEVER connect electrical power to the device once you start - Either batteries or deadly AC mains voltage.
- DO NOT FORCE any part. All parts can be dissassembled easily if you know how. If you don't: Ask.
- WEAR PROTECTION: Goggles and gloves will protect your eyes and hands.
- Don't be in a hurry: You won't learn anything and you will likely damage useful components.
- Try not to break things: The challenge is to recover as many components as possible.
- Devices are designed to be assembled quickly, not dissassembed. So this workshop will be a challenge.
- Ask yourself: How is this device held together? Screws, glue, ingenious little hidden tabs or clips?
- Think about what each part does and how it works before removing it and what you could use the part for afterwards?
- First remove parts connected together as working sub-assemblies. They may be easier to re-use in your pwn projects.
- Ask your family, relatives, teachers and friends if they have any suitable items you can deconstruct.
- Turn any useless electronics components or assemblies you collect into works of art.
Morse Code Workshop
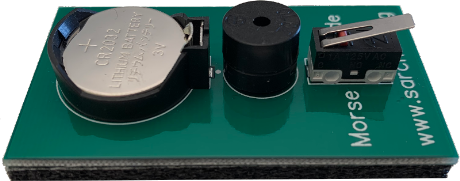
Here students experience the use of Morse code to send and receive coded messages. It is just an introduction, of course, which will help them get started learning a new skill.
First, they learn to recognise just the sound of a dot and of a dash. Then they learn the sound of the letters A through E. It is important that they really "hear the letters", not just count the dots and the dashes. Then, they get to receive some simple words with those letters.
The next part is even more exciting: They each get a mini Morse code practice set, which is theirs to take home. They learn how to send Morse code characters and take it in turns to send simple words to each other.
The session ends up with them learning to send their own name in Morse code.


Soldering Workshops
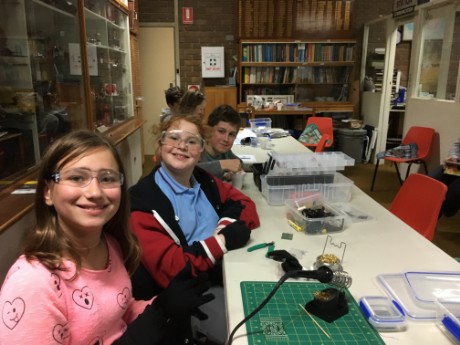
Soldering workshops include learning safe soldering and rework techniques for Plated Through Hole (PTH) - also know as Through Hole Technology (THT) - and Surface Mount Technologies (SMT). Eye protection and heat-resistant gloves are mandatory safety equipment. Only lead-free solder is used. Soldering is done in a well ventilated area and a small fan is used to disperse any fumes. See our soldering workshop news story.

Plated Through Hold (PTH) Soldering Workshops
For this workshop you will need your standard soldering station.
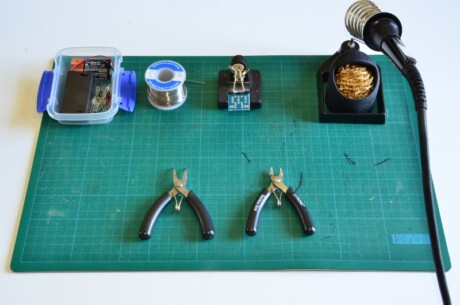
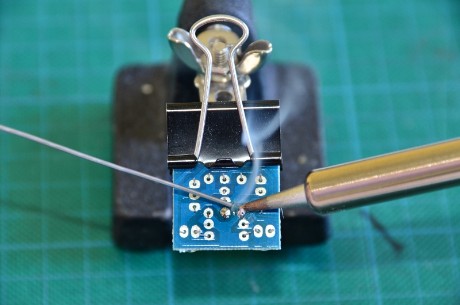
PTH Soldering Workshop 1
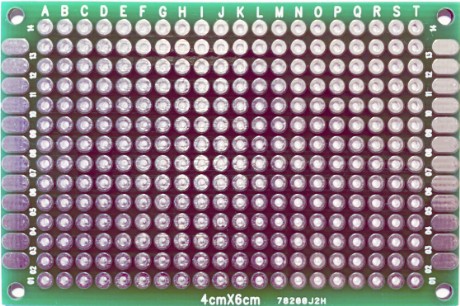
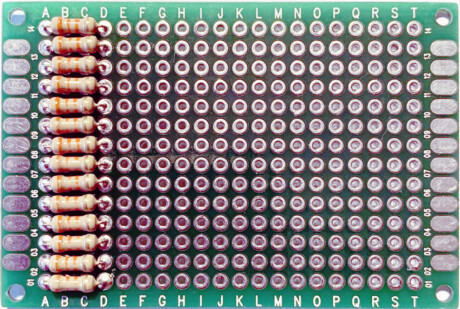
In this workshop we simply populate a double-sided PCB with resistors. Lots and lots of resistors! They have to be perfectly aligned in rows, with their colour codes all facing the same way and beautifully soldered with shiny concave fillets. Not too much solder and not too little. We inspect each side of the board to asses good solder penetration. By the time you have finished, you will be soldering like a professional. See our PTH Soldering Workshop Notes for details.
PTH Soldering Workshop 2
In this workshop you will assemble your first electronics kit. It is a small PCB with two flashing blue LEDs. All the components and the PCB are included in your kit. You can purchase the kit on our products page. You can download the instruction booklet here. The booklet for this kit also contains the setup of a standard soldering station, including all the safety equipment and step-by-step instructions. When you have built up the kit you can mount it behind the eyes of a cardboard model. You can even make your very own "Hypnotic Owl" - Cue spooky music.


PTH Soldering Workshop 3
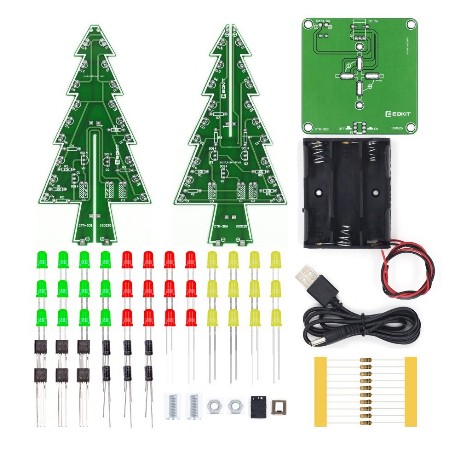
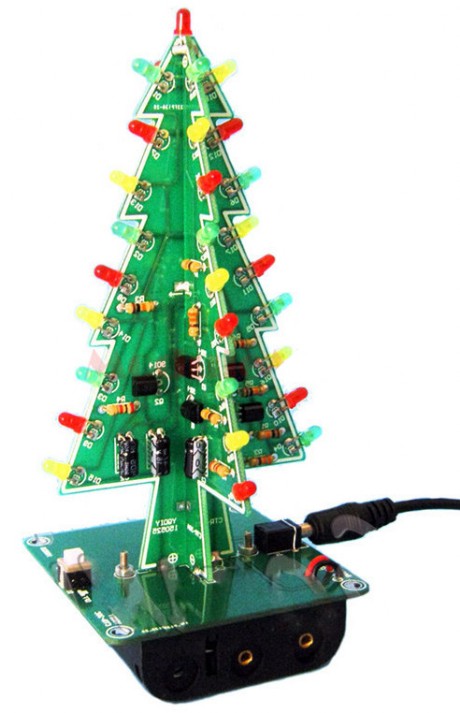
For the more advanced constructor, and great as a project over the Christmas break, you can tackle this Mini Christmas Tree LED project. Powered by 3 AA cells, or from the USB port of your laptop, this multi-coloured display looks really fantastic on the mantle-piece at Christmas. Download the instructions here.
PTH Rework Workshop
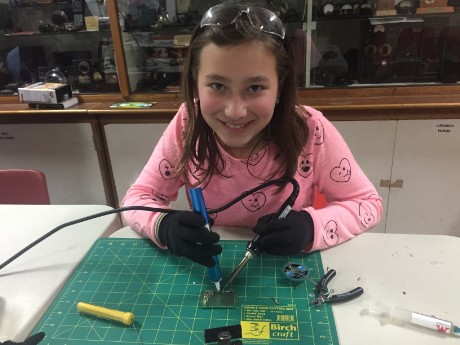
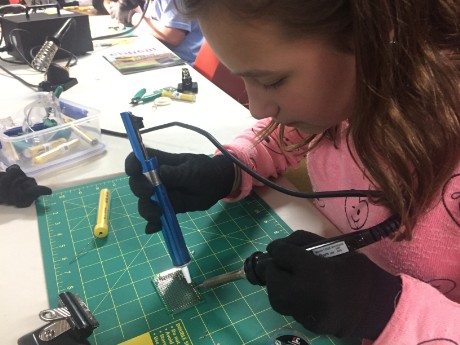
In this workshop we learn how to repair, or rework, PTH Printed Circuit Boards (PCBs). Electronics components on PCBs sometimes fail and they have to be replaced. The components have to be removed very carefully so that the delicate PCB pads don't peel off. Then the pads have to be prepared by removing any excess solder, using a solder sucker or solder wick. The components can then be formed, inserted and resoldered as before. By the time you have finished this workshop, you will be able to repair PCBs yourself (that is if you know which components have failed).
Surface Mount Technology (SMT) Soldering Workshops
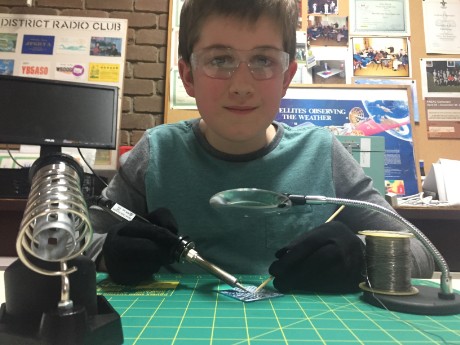
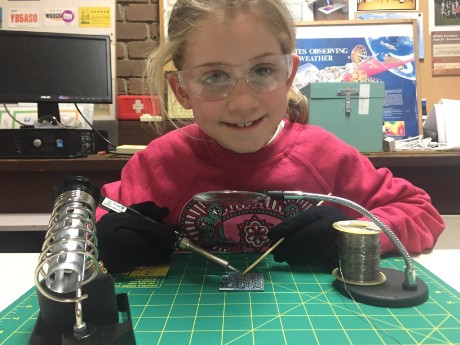
SMT components do not have long "pigtail" leads. They are soldered flat against the surface of a PCB, to pads with no plated through holes. The moulten solder has to "wik" underneath the contacts, so the PCB must be very clean. We use the skewer to hold the component in place, at least until one of the contacts is soldered.
SMT Soldering Workshop 1
For this workshop you will need your standard soldering station, but with a fine soldering iron tip, a strong magnifying glass, a wooden toothpick or bamboo skewer and a set of tweezers. You guessed it, SMT components are tiny: You can literally have hours of fun searching in the carpet for a component that went "twang" after it slipped out of your tweezers! Best to keep them in a plastic container so they don't get lost.
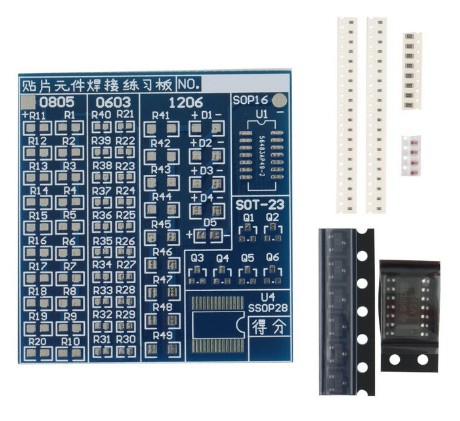
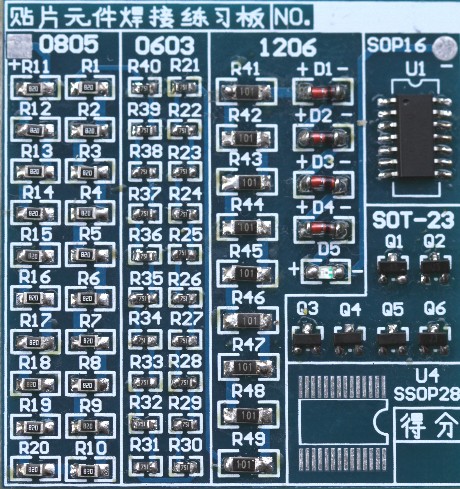
The aim of this workshop is to learn how to solder SMT components. We provide a practice SMT Printed Circuit Board. If you populate the practice SMT PCB correctly you can connect a battery to it and see the SMT LED illuminate.
SMT Soldering Workshop 2
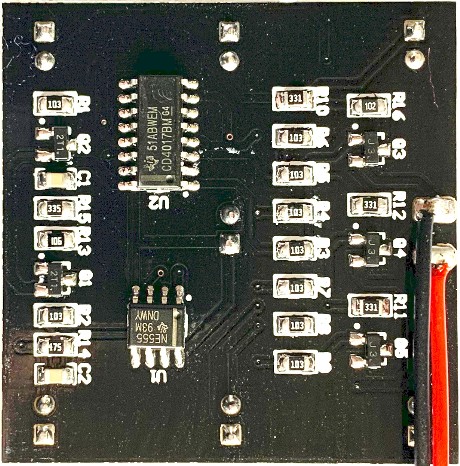
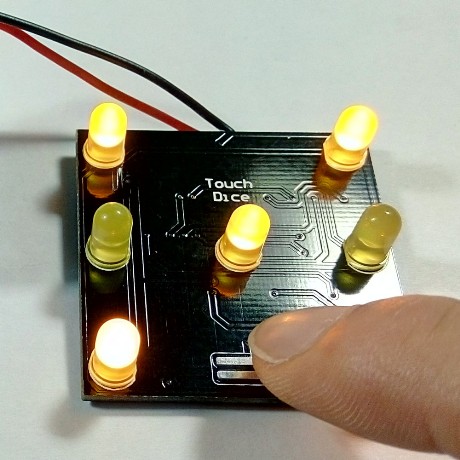
SMT Electronic Dice PCB assembly workshop. Now that you have practiced SMT soldering it is time to build up a kit of your own. This kit is an electronics touch dice. It works off a 9 volt battery. By just touching the two contacts on the front of the PCB with your finger, it sets the 7 LEDs in motion. They eventually slow down and stop flashing to reveal a random number from 1 to 6, displayed in the same pattern as used on a real dice. You can use this circuit with your favourite game of chance. See a clear overlay diagram here.
SMT Rework Workshop
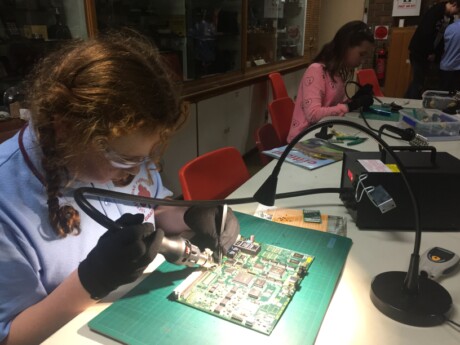
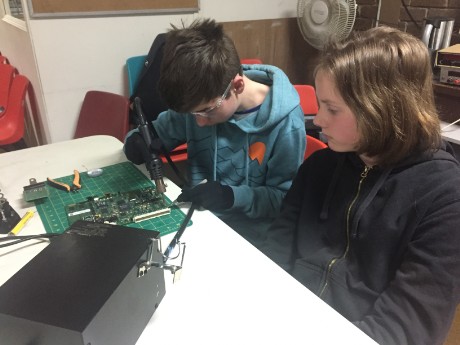
In this workshop we will be using a Hot-Air SMD Rework Station, operating at 350 Celsius. By pre-heating both the front and rear of the PCB we ensure that the components can be removed and replaced without damage. Then by concentrating the air stream on the IC pins themselves, we loosen the components enough to remove them with tweezers. It requires a steady hand and being able to recognize the sound of the air stream when it's at the correct distance from the PCB.
Microelectronics Workshop
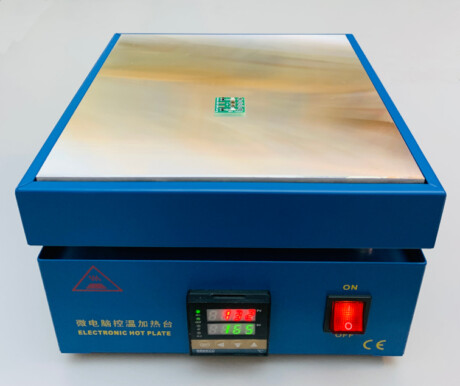
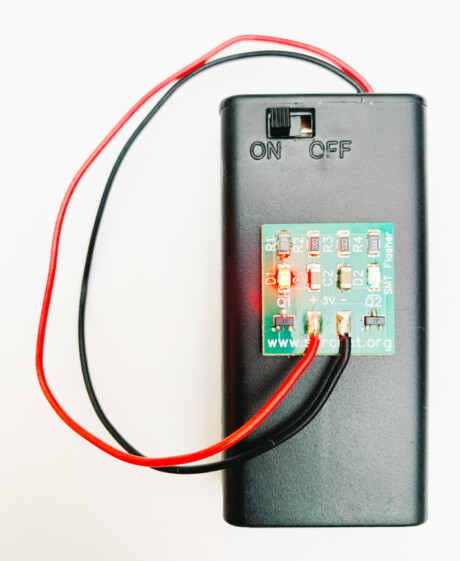
In this workshop we will build a small, battery powered, microelectronic circuit using Surface Mounted Devices (SMDs), reflow-soldered to a single-sided, Printed Circuit Board (PCB). The circuit is our favourite, two-led flasher. Because the SMDs are so small we like to use our magnifier lamp. The PCB is first placed on a work board. The solder pads of the PCB are coated with a tiny blob of solder paste from a syringe. The SMDs are carefully placed on the solder pads using tweezers. The PCB is then placed on a temperature controlled hotplate. The hotplate is turned on and the temperature quickly rises to 165 Celsius. In about two minutes the solder paste melts and all the SMDs are perfectly soldered to the PCB. The PCB is removed and allowed to cool down. Finally, we solder the leads of a 3V switched battery pack to it using a conventional soldering iron. When the battery is switched on, the red and green LEDs flash brightly. You can purchase the kit on our products page. You can download the instruction booklet here.
Microcontroller Workshops
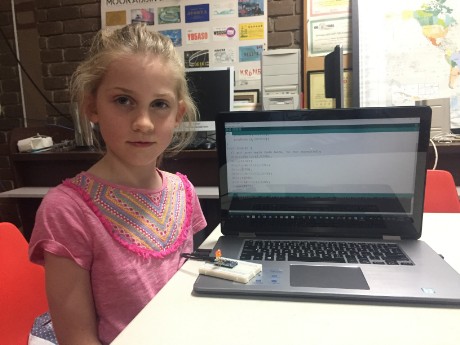
Microcontroller workshops include learning to code using the C/C++ or Micropython programming language and enough electronics to use a Microcontroller for some pretty interesting applications. Bring along your parent's laptop (they need a new one anyway). Download the free Arduino Integrated Development Environment. Purchase our Microcontroller Starter Kits for AU$25. The kit includes an Arduino Pro Micro or a Raspberry Pi Pico microcontroller board - you choose - (both pre-soldered with header pins), a 400-contact prototyping board and a Micro USB cable to connect to the laptop.
- The Arduino Pro Micro is a 5 volt, 16MHz, 8-bit, RISC Microcontroller with 32kB program memory, 2.5kB ram and 1kB flash memory. It has four counter/timers, five 8-bit PWM ports, nine 10-bit ADC ports, one UART, SPI and I2C port.
- The Raspberry Pi Pico is a 3 volt, 133MHz, dual core Arm Cortex-M0+ Microcontroller with 264kB program memory, 2MB flash memory. It has 8 programmable state machines, sixteen 16 PWM ports and 26 multifunction GPIO pins, three ADC ports, two UARTs, SPI and I2C ports,
It is more than enough for us to get going writing our own code and building really cool projects. See our SARCNET International Arduino Challenge news story. To participate in this workshop and for actual code snippets join our Arduino Forum.
The Microcontroller Workshops include:
- Arduino Pro Micro: Setting up, coding in C/C++ and debugging; or
- Raspberry Pi Pico: Setting up, coding in C/C++ or Micropython and debugging
- The Arduino Integrated Development Environment (IDE) or the Thonny Micropython Development Environment
- Your first "Blink" program
- Traffic Lights program
- On/Off Switch program
- Toggle Switch program
- For the more advanced programmer please download our Arduino for Amateur Radio Presentation.

Object Oriented Programming Workshops
Object-Oriented Programming workshops aim to start young programmers on the fast track to using and developing their own open-source libraries. It is never too early to learn the right way to program. Say NO to spaghetti code and get into OOP from day 1. The simple patterns and processes are easily picked up by our youngsters and once they get started they will never look back. There is method to our madness: OOP is really the only way to progress from the blink sketch in our microcontroller workshops to the multithreaded, non-blocking, real-time algorithms required for our robotics workshops. So hang on, we are taking this to the next level!
The Object-Oriented Programming Workshops include:
- What is OOP? Why use OOP?
- Are you an OOP developer or an OOP user?
- A Side-By-Side Comparison of Coding Methods
- OOP in C++ using the Arduino IDE
- Creating and Installing Arduino C++ Libraries using the Arduino IDE
- For more information and code examples please download our Object-Oriented Programming booklet.
- Download the oop.ino demo sketch including the following free Arduino C++ Libraries here:
- Led - Provides a flexible Led object with built-in Non-Blocking flash timer
- Switch - Provides a de-bounced, press-button or toggle switch object
- Timer - Provides a non-blocking timer object to replace the delay() function
- Filter - Provides a low pass filter object for sensors and motors
- Motor - Provides a PWM motor driver object with built-in speed filter
- Flow - Provides an ADNS3080 Optical Flow Sensor object for ground-vehicle navigation
- Download the following free Arduino demo sketches that use the above libraries:
- TrafficLights - Traffic lights with pedestrian crossing switches (For Arduino Pro Micro)
- TrafficLights2 - Traffic lights with pedestrian crossing switches (For Raspberry Pi Pico)
- MotorDemo - 4WD 2-channel electric vehicle
- FlowDemo - Optical flow sensor ground-vehicle navigation system
Computer Workshops
Computer workshops include learning to assemble and install Personal Computer hardware and software. The best way to do that is to start by pulling an old computer apart and seeing what is inside. Old, pre-loved, last-generation PCs are a gold-mine of computer components. To get enough parts to build one working computer we sometimes have to scavenge parts from two or three other PCs. We mix and match the components until they work. The next stage is to download and install free software. Finally we customize our PC just the way we want. See our computer workshop news story.
The computer workshops include:
- Computer components, what they do and how they work
- Installing the CPU and memory: Precautions for static sensitive components
- Computer interfaces and connecting cables
- Assembling the computer
- Starting up the computer and setting the Basic Input Output System (BIOS)
- Downloading a free Linux operating system
- Installing the operating system
- Configuring the computer and computer applications

Robotics Workshops
Robotics workshops include learning all about robot power, drive, sensor, actuator, control, communication and navigation subsystems and the techniques required for systems design, integration and testing. The group works together to design and build a prototype robot called SARCBOT, then individual students use the techniques learned to build their own "MYBOT" which they can take home, when completed.
The robotics workshops include:
- Robot types, capabilities, performance and evaluation
- Brainstorming robot applications
- Batteries, motors, actuators, drivers and sensors
- Microcontrollers and microcomputers
- Communications techniques: WiFi, Bluetooth, SPI, I2C, Serial, Digital
- System and subsystem design: Functions, Interfaces and Functional Block Diagrams
- Hardware and software design and implementation
- System integration and testing
- Please see our SARCNET Robotics Workshop Plan and our SARCBOT1 and SARCTBOT2 projects for further details.
- To participate in this workshop and for actual code snippets join our Robotics Forum.

Reference Information
Pin-Out Diagrams
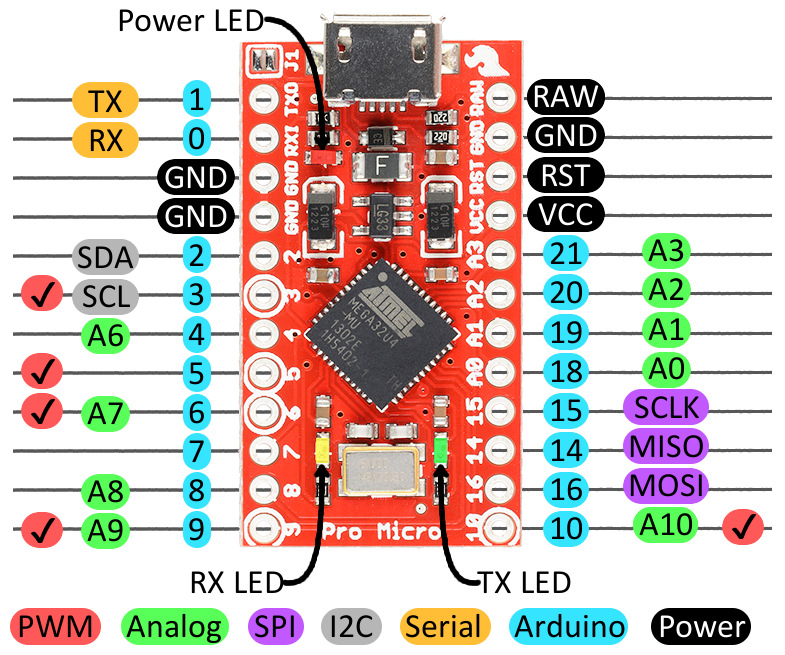
This is the pin-out diagram for the Arduino Pro Micro microcontroller.
We solder a 12-pin single in-line header to each side of this PCB so that we can plug it into our electronics prototyping boards.
We solder link J1 to permit our laptops to power any additional circuitry on the prototyping board.
This is the pin-out diagram for the ESP8266 D1 Mini microcontroller.
We solder a 8-pin single in-line header to each side of this PCB so that we can plug it into our electronics prototyping boards.

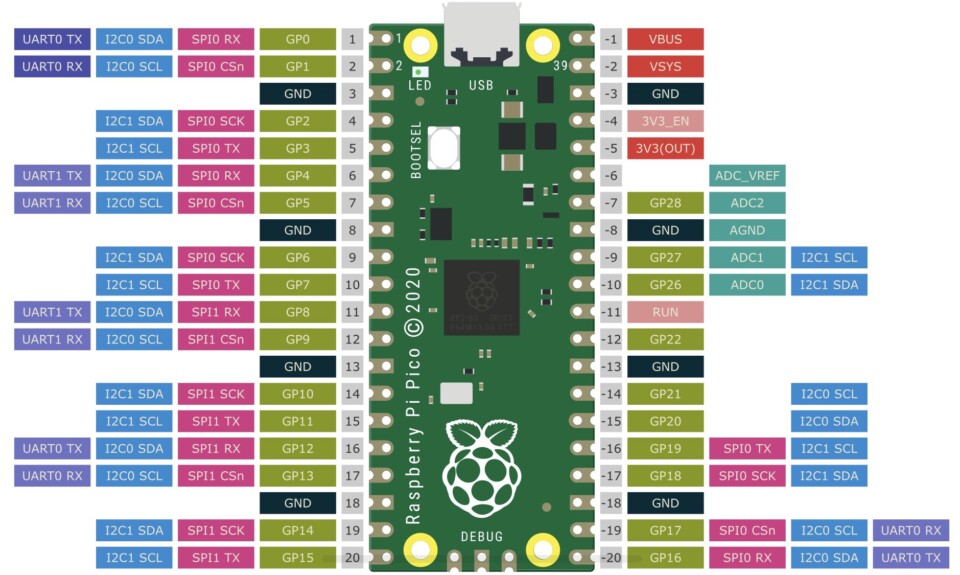
This is the pin-out diagram for the Raspberry Pi Pico microcontroller.
We solder a 20-pin single in-line header to each side of this PCB so that we can plug it into our electronics prototyping boards.
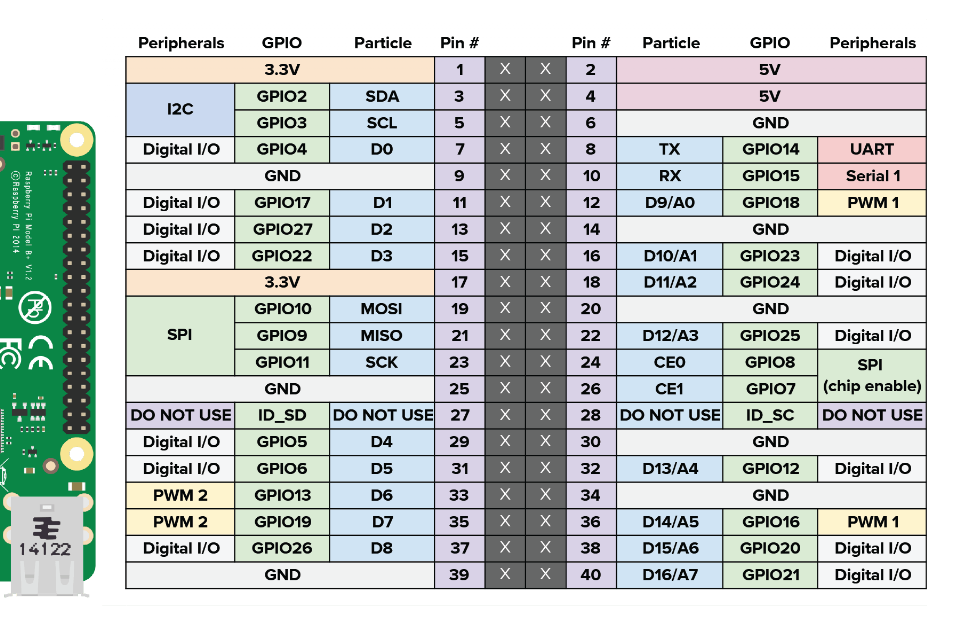
This is the pin-out diagram for the Raspberry Pi 3 single board computers.
The Digital Input/Output pins are 3.3v compatible.
